Google AdSense has now ruled the global
market when it comes in terms of providing advertisements for websites or blogs
and CPM and CPA and other such mechanisms which help generate website revenue.
Over the recent few years AdSenseAlternatives have turned up which they have given the option to many people all
over the world to gain the advantages of a more competitive ad market in terms
of higher CPC rates, increased networks and better revenue potential. Many have
had their own success stories.
Propeller ads is an Internet media company
making digital advertising effective and reliable. With global reach across web
and mobile channels, Propeller Ads gives publishers the ability to monetize
their traffic, while
providing advertisers access to a large number of ad places on premium sites of
various categories. Propeller is an Ad network that has been working since
2011. They serve 650 million of daily impressions and have several monetization
methods for both desktop and mobile traffic. They have a plethora of formats when it
comes to ads. Direct links, banners, sliding banners, pop-under ads and many
more formats.
Propeller ads the have the traditional banner
ads like every other network does, they have some very interesting ads that can
grow your Revenue substantially. However, Propeller uses a less intrusive
technology called On Click Pop Under, which means the ad is only triggered
after the user clicks anywhere on your website.
With this network you could generate with
on-click Pop Under Ads. The average CPM goes from $7 on different GEOS and up to
$12 or more on Tier 1 GEOS. Most people struggle to get $7 just with AdSense or
similar solutions, and the best part is that you can leave your banner Ads no
matter what you’re using and add Propeller to stack your earnings and double
your profit.
Do You want to monitor your website traffic in a simple way? Do you really want to know how many visitors you get per day, month and also within a year?
Today in this post I am going to show you how to monitor your website traffic using google analytic. Right by the way what those google analytic means and why it is important?
Well, Google Analytic is a freemium web analytics service provided by Google that tracks and reports a website traffic. This service was launched by Google in 2005. Google Analytic performs some features like where visitors came from, how long they stayed in your website and their geographical features and custom visitor. It also includes Website Optimizer service for their users. Actually, you don’t have to pay any amount before you get asses to Google Analytic as well as no monthly due it is free of cost for lifetime. Hence, if you are a webmaster then you must use Google Analytics for tracking your visitors.
What did I need Before Registering
ØYou must have a website, blog or forum.
ØYou must be at least 18 years old.
ØYou should have an idea on how to navigate through out a website, blog or forum.
Steps How to Register With Google Analytic
The first thing you have to do is to visit Google Analytics Website,you will be greeted with a beautiful landing page.
Now Click on the Sign up button
a page will open, now you need to fill in with your details. You can take help of below image as shown.
After filling all with your credentials, make sure you go through it to avoid mistake and misspelling when done now click on “Get Tracking ID” button.
make sure you read and accept google analytic terms of service
Now you have successfully been signed up at Google Analytics.
You will be now given a code ask to place on your site,
make sure you add the code in your Website’s Header File, after the <head> tag.
you can now track your website by going at “Home Pannel”.
I miss to copy or misplace the given code how would I found it?
In a case where you have misplaced the given code to you for any issue don’t worry you can easily find the code as follow:
While You are In your homepage Now Click on “Admin” button at the top of your dashboard.
Now, click on “Property Setting” from their you’ll find a “Tracking ID”.
In this tutorial we covered all the basic things about Google Analytics. Make Sure you share this post with your webmaster friends too. Subscribe to GuideTricks and tell your friends about GuideTricks too. Thank You, Keep visiting for more tips, tricks and much more.
Hello Welcome to Guide Tricks Tutorial, today
I am going to discuss on how you can remove popup or popunder advertisement,
have you been frustrating ads popping up on your screen at random times even
when there shouldn’t be any ads at all? The are various times when you are
using your browser you can figure that some popup or popunder advertisement are
popping in your screen and you are very sure that the site you have visited has
no popup or popunder and you are sure that such site can use popup or popunder
advertisement because it is very annoying, in such case you are infected with
an adware, and you’ve come to the right place to get this fixed.
First
let’s check out what does Adware Really Means??
Adware is a form of malware. An application
or command that is considered malicious. There are many different types of
adware. Some of them change your browser’s homepage and search engine, some of them
will keep on redirecting you to random websites, others will have pop-ups
coming up on your face at all times, and many more.
The really funny thing you need to know is
that we’re usually the ones who install these by ourselves. Do you know how??
They commonly come bundled with freeware programs. Usually we don’t provide a
specific time and sit to read the terms of agreement of a freeware program, we
just try to find where the tick box is located and we just click on it which
says “install this program”, “Continue with Installation” or something Similar.
That’s how adware gets directly inside your PC in an easier way.
Why
does Developers Add Such Things in some free Software?
The Answer is Clearly and Straight Forward is
to make “money”. It’s a dirty way for such people to force you watch their ads
so that they can earn a revenue from it. this is against the terms of agreement
in all of the ad networks that I’ve ever seen. So, they have to make sure that
the ad network which they are using, will not realize that they are “utilizing”
their ads in such a way, So the use this opportunity to add the ads in the application
or software.
How to Remove Adware Manually
This manual method works for adware that has changed
your search engine, redirects you to random websites, and one that has changed
your browser’s homepage.
Click on the options button which is on the
top right corner of Chrome. Then move your mouse over to “more tools”, and
click on extensions.
Now click on “Get more extension” you will be
redirect to chrome to store now search for “Fair AdBlocker” in the search
button and install it in your chrome browser.
How to Remove Adware Automatically
The easiest way to remove adware automatically,
is by using an Anti-Malware. I personally prefer MalwareFox for that kind of
job. Just go to MalwareFox.com, download
the free version of the Anti-Malware, install it, perform a full scan with it, and
remove everything that it detects. That’s all. Easy right? If you have any
other way on how to block popup, popunder advertisement write it down in the
comment box below:
Hey, welcome to guide tricks, This is a simple program created in PHP and MySQL serve as quiz system. First, a student needs to register then click on "Take Exam". It should be your reg_no and password for quiz test.
Hope you like this don't forget to share with your friends in Facebook, WhatsApp, and Twitter and keep on visiting for more tutorials and free codes.
Hello guys, today I came up with my personal review about RevenueHits.com. Well, but this post is not for all people, but for people who run websites/blogs [Bloggers].
Nowadays, there are a lot of ways to earn money from our websites/blogs. In that, CPC, CPM, CPA etc are most famous ways. As per my view, it is quite easy to earn money with CPC rather than CPM, CPA. Coming to CPC., Google Adsense is the most famous one to earn money, but getting Adsense approval is hard today. Even though we have Adsense, we may not get enough cash! For example, I don’t have Adsense for some of my sites, many times I got rejected, So I was searching from a long time about how to earn money from those blogs other than Adsense, then I Found Revenuehits. So I started using it, done experiments with various ad formats, earned some money, and finally satisfied well! So I decided to write a review post on how to sign up in revenuehits and I wanna share all my experience,
Are you looking to improve the monetization of your website, but have low RPM or low CPC? Do you have good traffic, but you are not earning enough money? There’s a good solution out there for you. Based on my own experience, comparing the ad networks I used, I would say that RevenueHits is absolutely the best choice for website monetization.
When I wanted to start monetizing my websites, I took time to contact a few networks, and RevenueHits was one of them. I joined RevenueHits and set up an account very easily. After setup, I received some tags (ad units), which I placed on my website. With 5,000 different advertisers on RevenueHits I tried out a wide variety of ads, until I found the ones that best worked for my site.
Signing up and submitting your site for Approval:
· To sign up (opening an account) at Revenuehits, ClickHere. This is my special link for submitting your websites/blogs for instant approval!
·So after you open the link which I gave, Now fill the details carefully in Step1 and Step2 and finally click “Submit”.
·Now verify your email address and login to your account
Creating Ads
·To create ads, open Placements tab in your Revenuehits account.
·Now it’ll show you 2 options – “New Placement” and “New Mobile Placement“.
“New Placement” means the ads related to Desktop site & “New Mobile Placement” means the ads related to Mobile site. the types of placements and the ads available in those placements.
Desktop Ads: In this type, all the desktop mode ads will be present, like Banner ads, slider ads etc. Of course, whatever the ad format which you select here, and place it on your site/blog, then the ad will run both on desktop version and mobile version of your site, which means, if a reader from the USA visited your blog from his computer, he’ll see the ad and if a reader from the UK visited your blog in his mobile, he’ll too see the ad. So in simple, I can say as, all the ads in “New Placement” tab will run both on Pc and mobile. ad formats and ad types are available as follows:
ØBanner
Ø158×21 Button
Ø468×60 Footer
Ø728×90 Footer
ØInterstitial
ØPopunder
ØShadow Box
ØSlider
ØTopbar
Mobile Ads: In this type, all the mobile mode ads will be present, like Mobile Dialog, Notifier etc. Here we should note one thing, except 2 ad placements (Interstitial & New Tab), remaining all ads will run only in the mobile version of your site/blog. For example, if you are running Notifier Ad on your site, now if a reader from France visits your blog from laptop and another reader from Russia visits your blog from Cell, then the Russia reader only will see the Notifier Ad on his Cell and the Laptop reader from France won’t see any ad on your site.So here, most of the ads in Mobile Placement tab will run only in mobile.
Available Ad Formats
vMobile Dialog
vFooter
vInterstitial
vNotifier
vNew Tab
So now once you get a clarity of the selection of your required ad slot, you have to setup the ad code and place it on your site. Well, I’m showing it completely by taking an example of the banner.
once you are on Placement tab in your Revenuehits account, select your required placement (Desktop/mobile) and then select your required placement type (ad). So for example, I’m taking banner ad in the “New Placement” ads.
So now it’ll show you a form type and in that you have to fill some details like Placement name, selection of your Site, Description of your Ad etc and finally click “Save”.
So once you save it, Placements tab will be opened automatically and all the ads you created will appear in Placement tab. So on your required ad, you should click this “</>” button and then the ad code of your ad will open in a box.
Now you have to copy that Ad code and place it on your blog/site. As I’ve created banner, If your blog/site is Blogger site like mine, then you’ll place the Pop up Ad code in HTML/JavaScript box of Layout Section.So like this, you have to create your required Ad and place it on your site/blog.
Within how much time the Revenue stats will get updated in our account?
“Revenue” will be updated only oncefor 24 hours and that’ll be the final revenue! all our daily earnings are “Finalized earnings”,
Which Ad Formats will I Place to gain more Cash in Revenuehits?
best Ad Formats in this Revenuehits review post which gives you lots of money are Popup Ad, Leaderboard, Interstitial.
Payments
Well, you can always check your earnings in the “Payments” section. The current balance, previous months earnings etc will be present there!
Now the minimum threshold Payment is $20 but not $50. evenuehits Payment is in net 30 terms. Which means if you earn total $60 in this month, then you’ll get that $60 in next month ending. And their payment process are Payment will be done by Paypal, Wire, and Payoneer. So you can select your required method.
Conclusion
try for 5 days if your blog ad slots are empty Experiment yourself with various ad formats available there like Popup ads, slider etc.You may get more money than me, who knows?So if you have doubts or any new ideas, please post it in the below comment box! Btw, please share this post with your blogger friends and let them also earn some money!
I’ve also made the video by showing all the above steps of this part, so you can check the video too.
Hello guys, today I came up
with my personal review on
how to add related posts to your BlogSpot post using a simple process,
showing related posts in your blogger blog have many advantages and one of the
major advantages of it is letting your readers stick to all over your blog.
The usual practice is to show related posts after any posts and once a reader is
done reading the current article, he can simply pick one from the related
section shown. Usually, related posts show articles from your blog which is
related to the current article. Depending on which method you are using to show
related posts, it will show the related posts as relevant as possible.
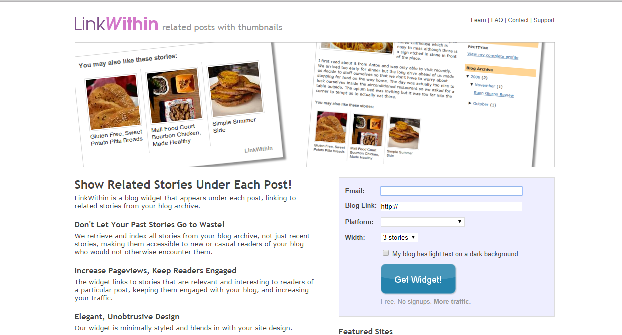
How to use Linkwithin Widget to Show
Related Posts on BlogSpot
Linkwithin makes
easier for blogger users
to add a related post in their blog without using difficult techniques, One of
the cool things about Linkwithin Widget
is it shows related posts with pictures that you have already posted in your
blog and it is relevant to the current new post, that means you will get
better CTR.
The widget is free and very simple to set up to use links within you have to create
one for your blog Here is an example of mine.
How Would I Create For My Blog?
First, you need to visit within Homepage by clicking
here, On the page, you need to insert your Blog URL, Platform (Blogger) in your case
and select the number of related posts you want to show after every post. Click
on get widget and on the next page you will be getting instruction on how to add Linkwithin widget to
your BlogSpot blog.
You will be able to quickly add the widget on your blog and it
will start working immediately after adding. Though this plugin is simple to
use and anyone with zero tech skills can use it on their blog. One limitation
of this widget is, it doesn’t directly link to other articles, so you miss out
a bit on internal linking.
If your BlogSpot template allows you to have a related widget
which directly links to other posts, I recommend to use it. If you don’t have
that option, you should stick to LinkWithin Widget. If
you know of any other method which a BlogSpot user can add
related posts with thumbnails, let me know via comments. Don’t forget to share
this article with other users on Facebook, Whatsapp, and Twitter.